
embedded code
 Teensy 3.0
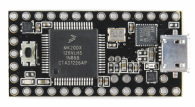
The Tether prototype runs on the Teensy 3.0, which is a 32-bit ARM Cortex microcontroller that provides 16-bit ADC resolution, four timers and full HID support at a 3.3V input. The embedded code is loaded using Teensyduino, an add-on for the Arduino IDE with a custom loader. All of it is written in C++, using the Wiring language.
Our embedded code is separated into three modules and a main execution file. The modules interact using public methods declared in their header files, which creates a level of abstraction to ensure robust functionality. The COMM module handles all USB and Bluetooth communication, and provides an identical interface for reading and writing commands. The XYZ module handles all reading of all sensor inputs, and outputs processed/scaled/smoothed <X,Y,Z> coordinates and button events. The HID module provides functions and serial commands that turn the Tether device to be turned into an HID compliant mouse and joystick, and outputs proper mouse/joystick events when desired. The main execution file is a simple script that includes all modules and uses a timer library to update each module at an individual loop speed defined in their header files.
Tether uses a proprietary serial communication protocol, in which each command is defined by a command name, arguments separated by a delimiter character, and an end character. In the future, an escape character and XOR byte will be included to allow for arbitrary byte transfer. Each module registers commands with the COMM module by providing a function callback that is invoked each time the command is received. The function callbacks must take the correct number of arguments as defined by the command. The COMM module has an update loop in which it reads from its input buffers, parses full commands, and invokes any registered callbacks for that message name. Each module also sends out commands using public methods from the COMM module. Bluetooth and USB are handled identically and so commands to and from each will be processed in separate buffers, but in the exact same manner.
The embedded code is proprietary and will be included in the archive, but not on this site.
android library
You can connect Tether to any device that accepts mouse or joystick input without installing any software at all. However, this is like flattening Tether into a 2D input device. The real magic happens when you integrate the Tether directly into an application to take full advantage of the natural mapping of 3D space it provides. We provide an Android library that handles all communication and processing, making it incredibly easy to integrate tether into any application. You can simply use our API and start receiving 3D coordinates from your Tether device with less than ten lines of code.
Our Android library is called libtether, and compiles into a single file libtether.jar to be included into any application. The library works by creating a Tether object, registering a handler, and calling .begin() to open the communication channel. The handler will then start receiving messages from the library. Here are the messages currently provided:
Our Android library is called libtether, and compiles into a single file libtether.jar to be included into any application. The library works by creating a Tether object, registering a handler, and calling .begin() to open the communication channel. The handler will then start receiving messages from the library. Here are the messages currently provided:
- Tether.CONNECTED
- Tether.DISCONNECTED
- Tether.POSITION_UPDATE
- Tether.BUTTON_1
- Tether.BUTTON_2
- Tether.AOK
- Tether.ERROR
private static final class TetherHandler extends Handler {

    private final MainActivity activity;
    private TetherHandler(MainActivity a) { activity = a; }

    @Override
    public void handleMessage(Message msg) {

        Bundle b = msg.getData();
        switch (msg.what) {
            case Tether.CONNECTED:
                activity.tetherConnected();
                break;
            case Tether.DISCONNECTED:
                activity.tetherDisconnected();
                break;
            case Tether.POSITION_UPDATE:
                double X = b.getDouble("X");
                double Y = b.getDouble("Y");
                double Z = b.getDouble("Z");
                activity.tetherPositionUpdated(X, Y, Z);
                break;
        }
    }
}
Once the handler is defined, just call three lines of code in your onCreate() to begin receiving messages:
tether = new Tether(TETHER_ADDRESS);
tether.setHandler(new TetherHandler(this));
tether.begin();
The library itself can handle links to multiple Tethers. If a Tether is already created for a given address, a different application can access the object by calling Tether.getTether(), a static method. This works because each Tether object created is saved in a static dictionary in the library. For each open connection, a new thread is spawned which handles Bluetooth communication and timeouts, as well as parsing serial commands into Message objects and vice versa.
The libtether code is proprietary and will be included in the archive, but not on this site.
The libtether code is proprietary and will be included in the archive, but not on this site.
Official app suite

We have started developing a suite of open-source Android applications that use the Tether library. The goal for these apps is to show off awesome interactions enabled by Tether integration and also to act as code examples for developers making their own applications. We have built a measurement app that measures distances and angles, and a painting app that allows drawing on a 2D canvas with the third input dimension changing the brush size. These applications are open source and can be found at these links:
t.paint: https://github.com/misheljohns/Tether-Paint
t.measure: https://github.com/misheljohns/Tether-MeasureMe
We also have a third app t.configure which is the fastest way to configure any settings of a Tether device, such as changing the orientation, units, or mouse/joystick functionality. It is currently private due to debugging features and the ability to send arbitrary serial commands from the GUI.
